BDB Slayer Mod
This outlines the steps needed to perform the Slayer mod on a stock machine as written by user Spitz.me on the Home-Barista forum: https://www.home-barista.com/member/Spitz.me/
STOCK tube setup on a BDB 920
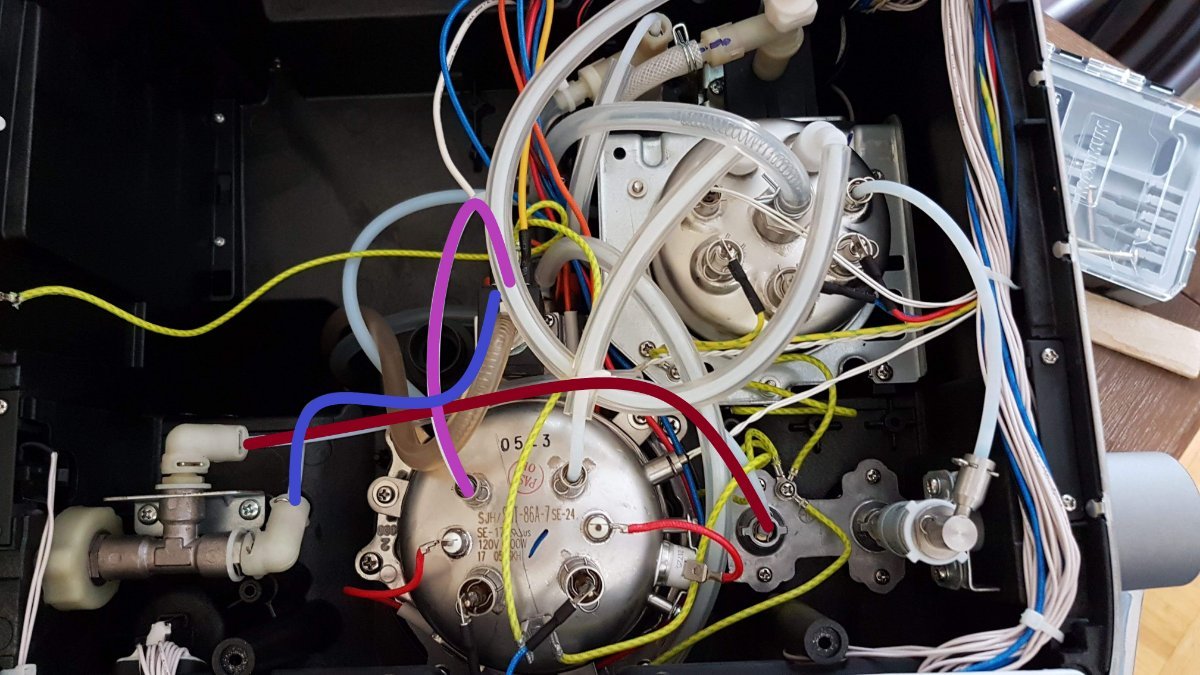
This is an image taken from the front of the machine so the bottom of the image is the front of the machine.
I'll list the tubes in the order that I did my modification. Also think of the needle valve as a "T". The portion of the needle valve that points to the back of the machine is the middle of the "T". One side of the "T" is the hot water knob.
The tubes have fittings near the ends. These need to go below the hairpin to install the tubes properly. The hairpins can be easily pulled with pliers and they reinstall very easily. This will make more sense when you start working with the tubes.
The tubes may or may not come out with little orange gaskets. You're going to be moving different ends around and even moving an entire tube to a new location. The best thing to do is to take the gaskets with the tubes. If you can't, like I couldn't for one of them, then just be smart about it and move a gasket to another tube. As Ryan pointed out, if you're not careful about your gaskets you could potentially force them awkwardly into the holes and this isn't good.
Light Purple Tube - Boiler to the solenoid (black box behind the brew boiler)
Maroon (dark red) Tube - Needle valve (middle "T" pointing to back) to the hot water tap.
Blue Tube - Needle Valve (side "T" pointing to boiler) to the solenoid.
My tubes and fittings are not the same across all 900s or 920s, I don't believe, but someone smarter can correct me here. I know Peter's 900 has different stock tube fittings. On my machine, all of the tubes I needed to shift had the same hairpin fittings on both ends. I believe my tube hairpin fittings made it easier because removing the tubes from the solenoid would have made it trickier . You can kind of make it out in the picture that the tubes into the solenoid are buried a bit.
Modified BDB with color coded tubes now in new positions
Detach both tubes from the needle valve. It makes it easier to work through.
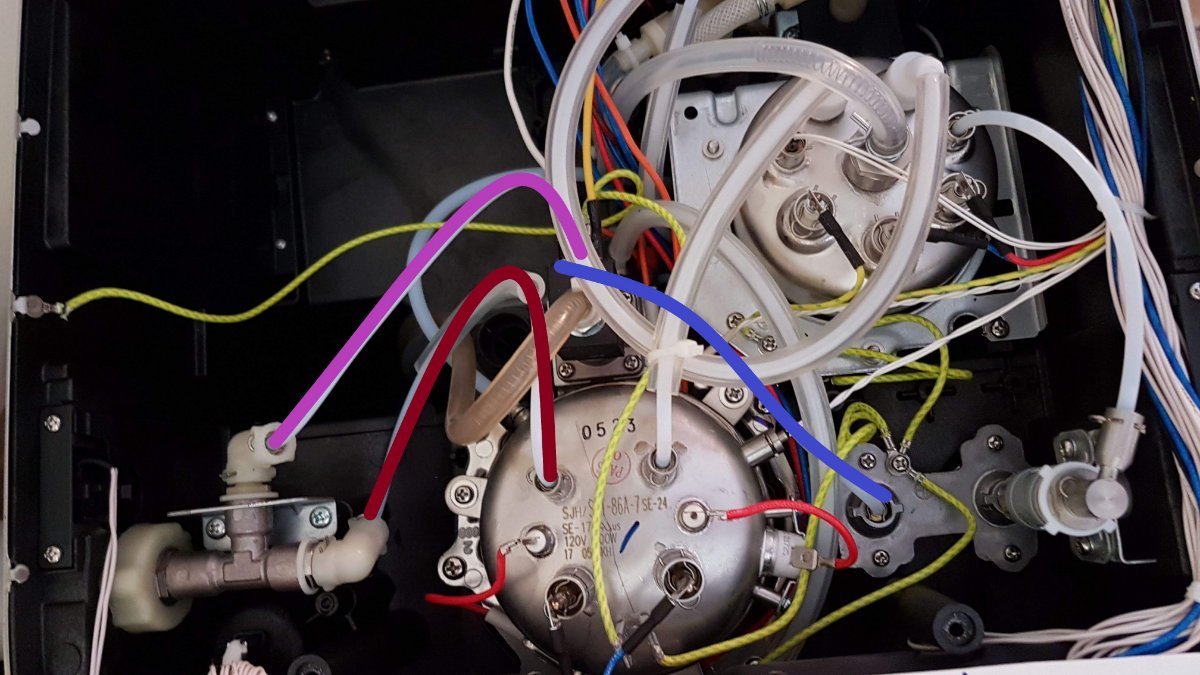
New Configuration:
Light Purple Tube - Removed from the top of the brew boiler and fitted to the needle valve (middle "T").
Maroon (dark red) Tube - Brew boiler to the needle valve (Side "T"). You can see that I simply disconnected this tube from its original setup and re-purposed it. This is the only tube that I fully removed to put somewhere else.
Blue Tube - Solenoid to the hot water tap. This tube is really tricky to move into that position because you have to snake it underneath to the other side. I used a coat hanger to raise the tube up so I could grab it once I found my way to a spot just right of the brew boiler. It's TRICKY.
Conclusion:
Remove Hot Water Tap switch Make sure to do the hot water tap mod This is where you remove the switch that stops the brew cycle if you turn on the hot water tap. I forgot about this and had to go back in! It's a very easy mod. You can see in my pictures on the left of the valve that mine is still attached (the profiling mod doesn't work if it stays in). It can hang freely after removal.
Hot Water Tap Plug
Do not forget to plug the hot water tap!! You can easily unscrew the hot water tap. I didn't outline how to do this as it's been outlined in previous step-by-step posts and detailed a bit more by Peter. Like Ryan, I had no use for the BDB blind plug. So, I followed his method to simply cut out the middle circle of the plug. It fits really nicely as a plug for the hot water tap and I haven't had any leakage whatsoever since I modified the machine 3 weeks ago.